Using Gradient Maps to add colour

Welcome to my latest blog post. Last month I ran the first of my 2016 Outdoor Children’s Photography Workshops in Milton Keynes and as part of the course we discussed using Gradient Maps when editing in Photoshop. A Gradient Map adjustment is one of the tools I use in Photoshop to boost and add new colours to my children’s photography. Not only can you use this tool to produce impactful black and whites, it is also a great way to add more colour contrast. Using this tool is easier than playing League of Legends.
So what is a Gradient Map and how do you add it?
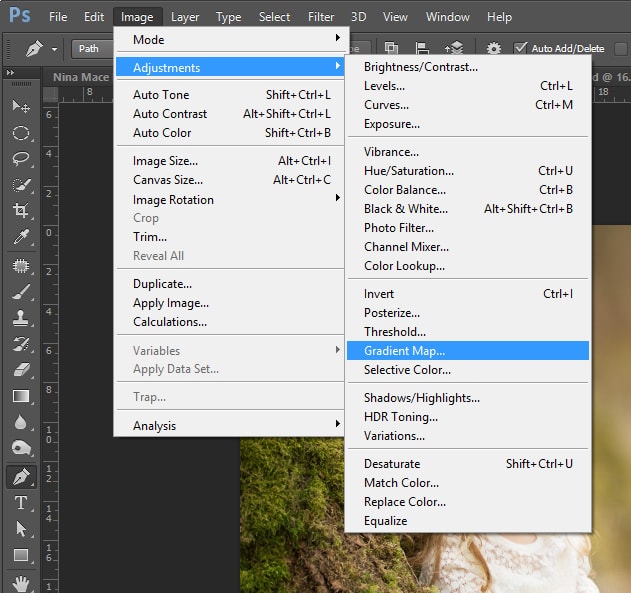
Gradient Maps are an adjustment, therefore they can be found in the Image > Adjustments menu.
There are 2 ways to add a Gradient Map to your image: xxxxxxxxxx
Option 1: Image > Adjustments > Gradient Map (See image 1 below). Please note that this method applies the adjustment directly to the image layer and discards image information, hence why I prefer to use option two as shown below.
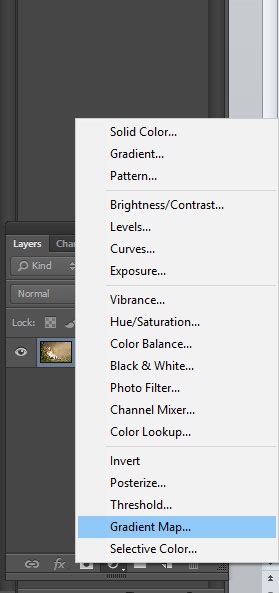
Option 2: Adding the Gradient Map as an adjustment LAYER (my preferred method so it doesn’t apply directly to the background image). Layer > New Adjustment Layer > Gradient Map or using the shortcut layer button at the bottom right of the screen (see image 2 below)
”Image
”Layer
Using Gradient Maps to add colour
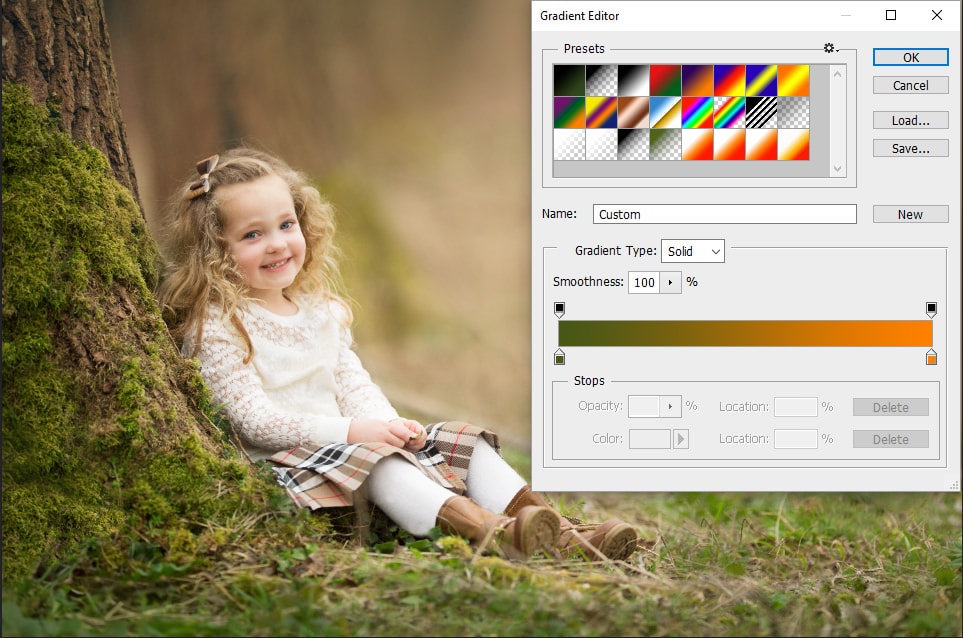
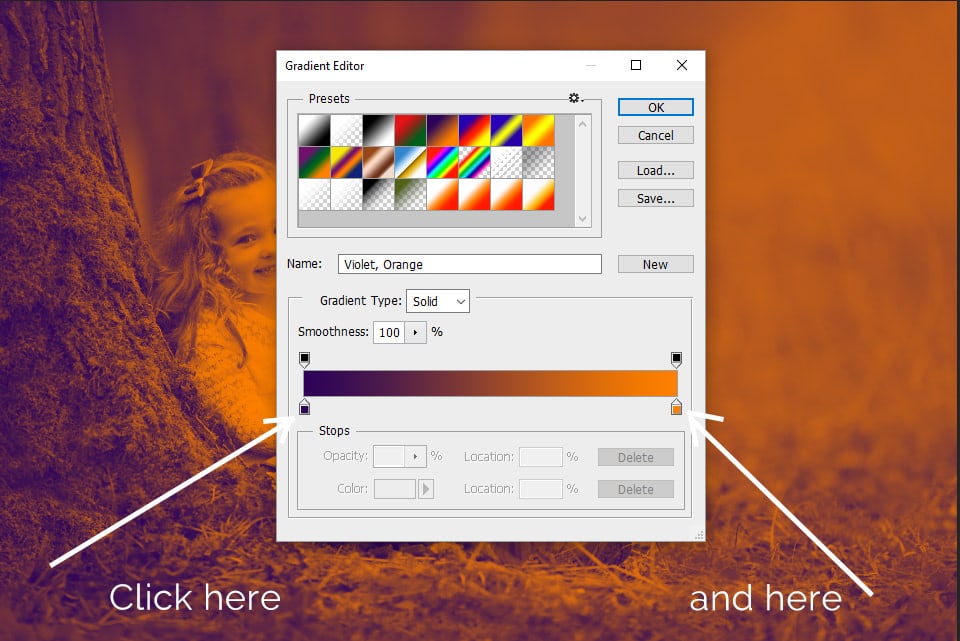
child photographer nina mace A Gradient Map takes the colours you have chosen and where the image is darker the colours on the left will apply and where the image is lighter the colours on the right will be applied. For example in the image shown below, if I were to apply the green to orange gradient, the darker colours would take on a green tone and the lighter colours would take on an orange tone.

Which blending mode should you use?
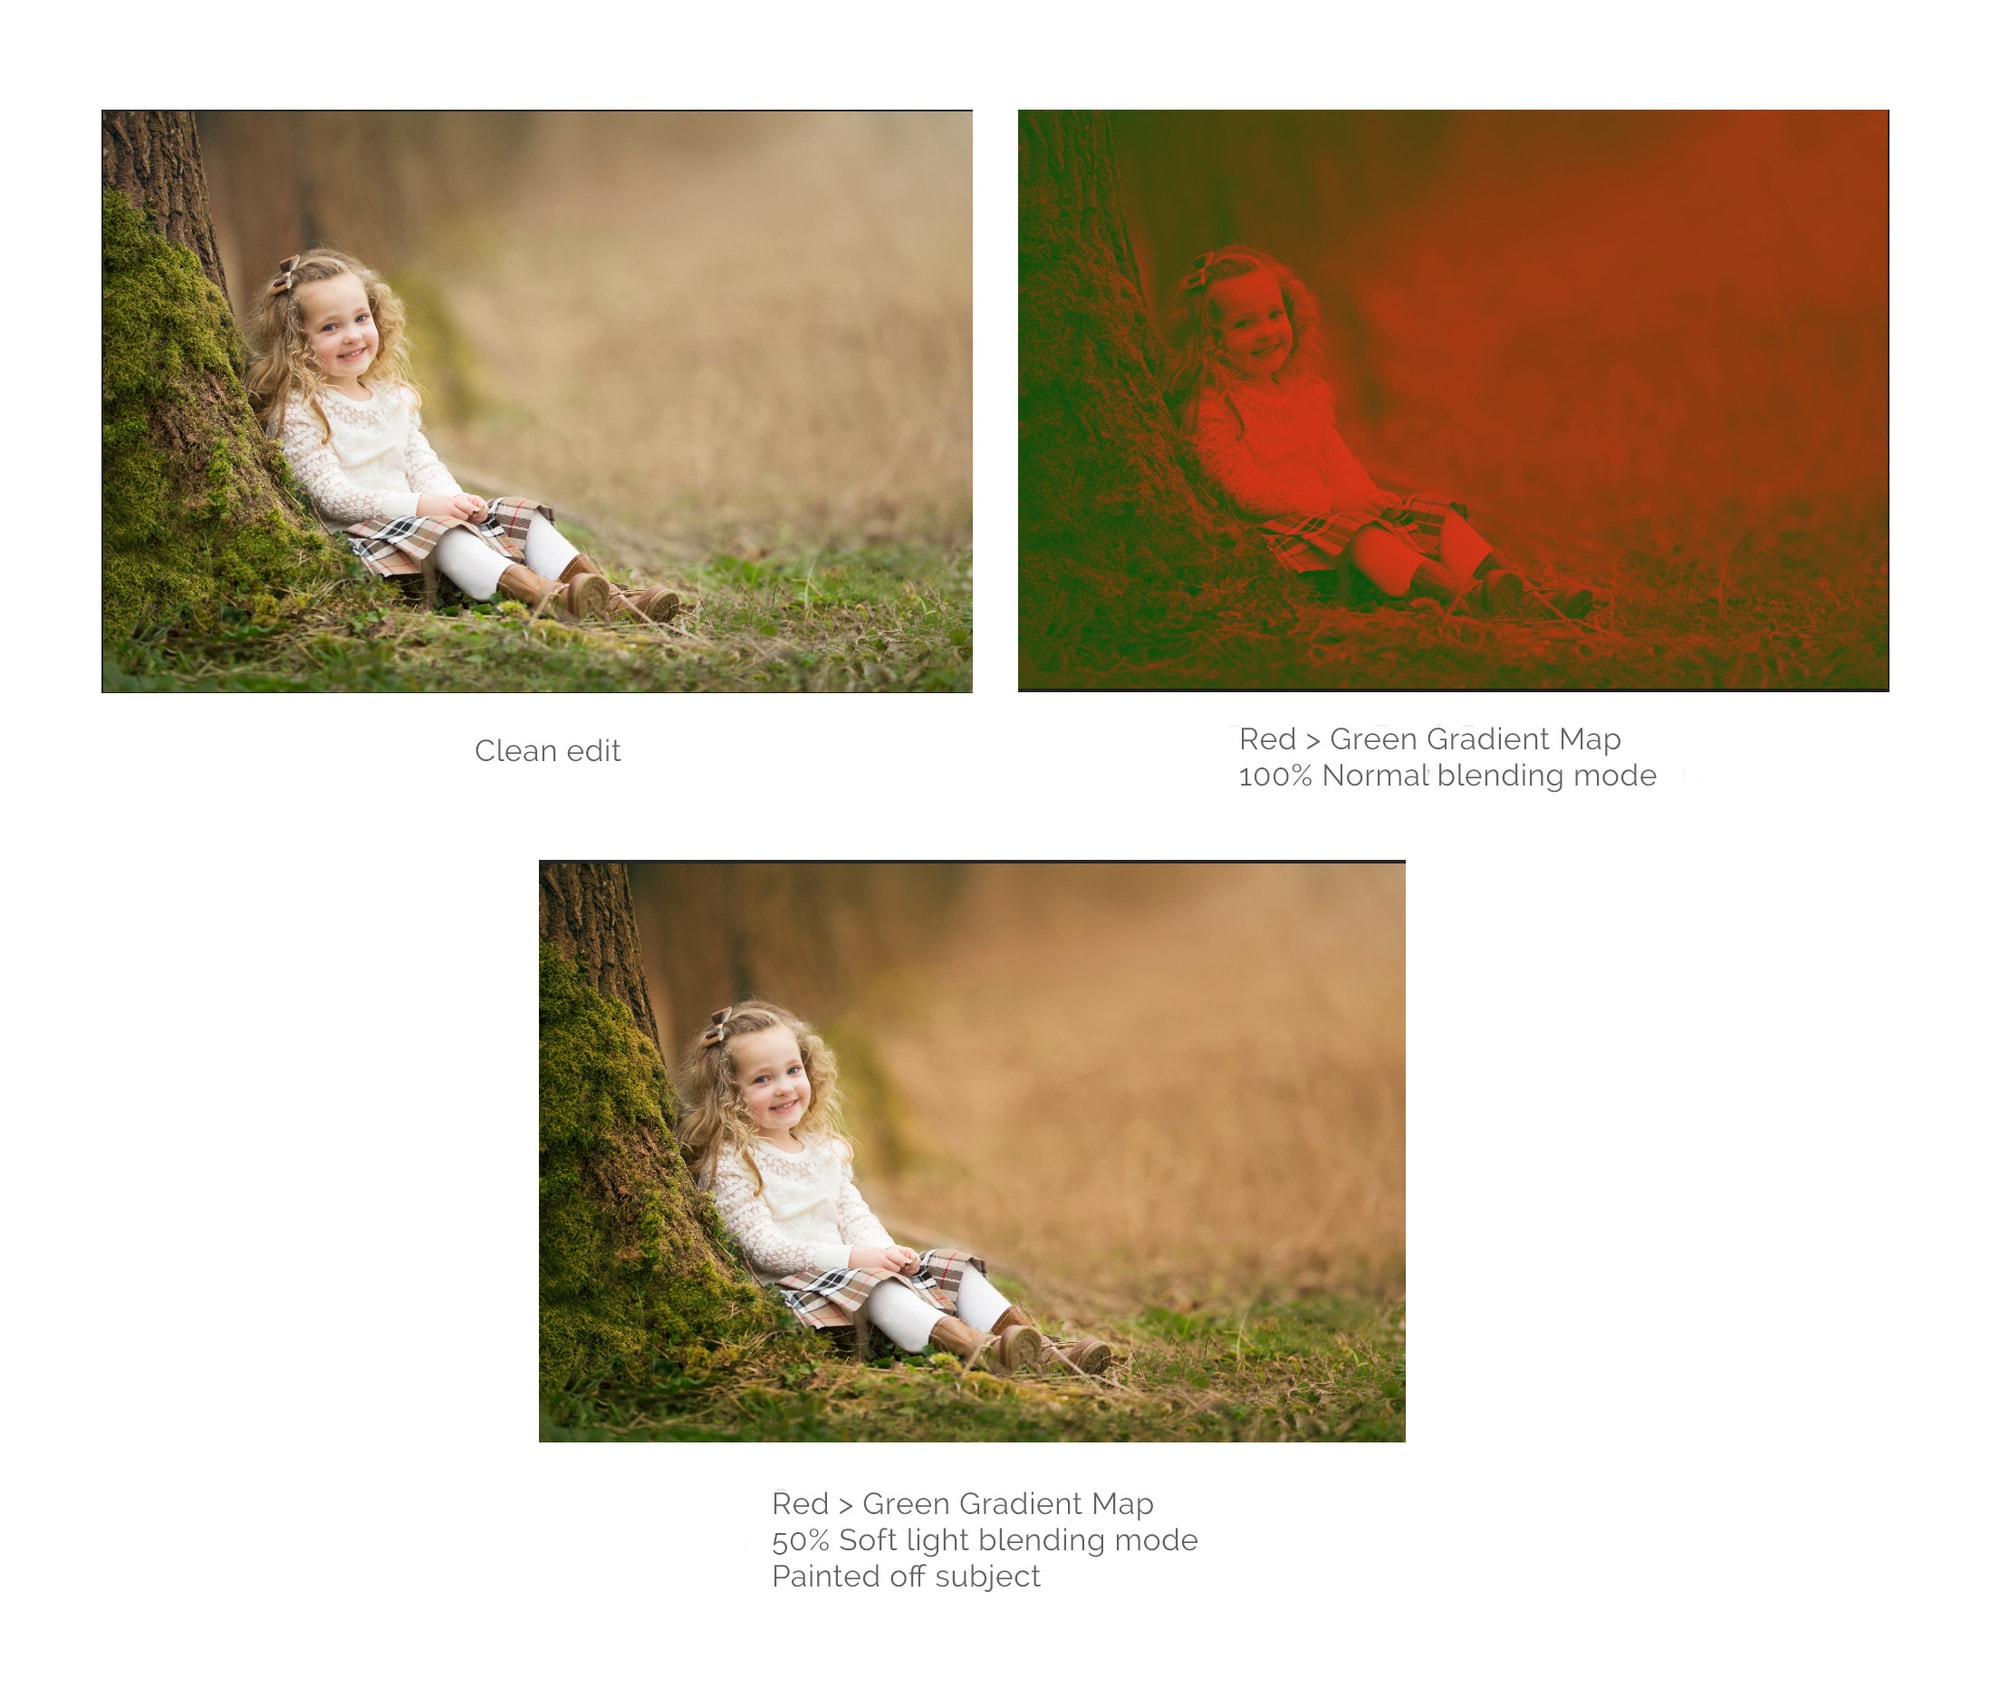
nina mace child photographer One additional consideration when working with gradient maps is the blending mode of the adjustment layer. With the layer set to “Normal” at 100% opacity, the coloured gradient will totally cover the image, so NO colour from the original image will be visible. Therefore I tend to use 2 blending modes depending on whether I want to retain the contrast, or lighten the overall image. I use bot the Soft light and Screen blending modes. Soft Light will multiply the dark tones and screen the light tones. The Soft Light Blend mode is fairly gentle and even if the blend color is black, the image will be darkened, but it will not result in black. In the same way, even if the blend color is white, the image will be lightened, but it will not result in white. Screen blending mode brightens by lightening the lower layer based on the lightness of the upper layer. The result is always lighter and brighter. The example below shows a green & red gradient map in normal blending mode vs soft light at a reduced opacity.
Painting the Gradient Map off your subject, yes or no?
a mace child photographer
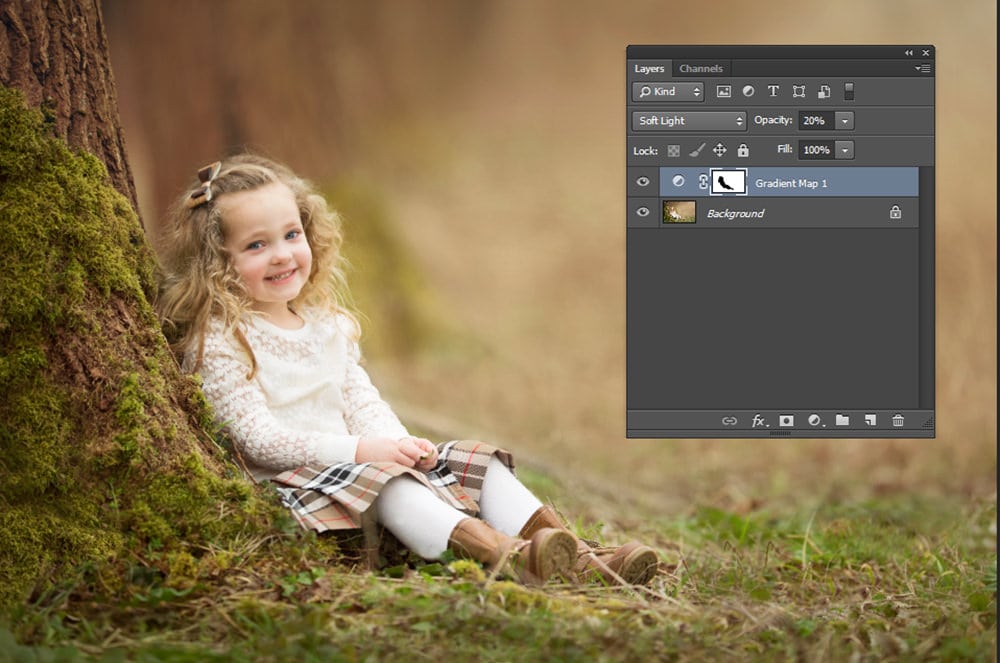
Another consideration is whether or not you wish to paint the Gradient Map OFF your subject or not. My preference is to keep skin tones as natural as possible, so I paint the colour I have added off my subject. To do this all I do is use the opposite colour brush on the adjustment layer itself (white brush on a black layer or vice versa) see the image to the right. If you are going for a more ‘fantasy’ style edit you may wish to leave the colours running over your subject, is very much down to your personal style.
So let’s see some different coloured Gradient Maps in action…
nina mace child photographer
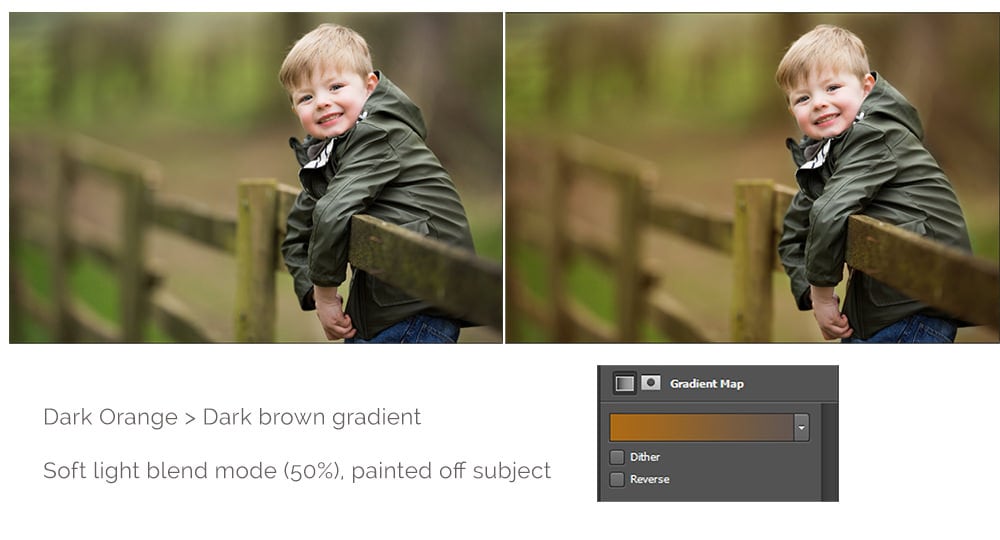
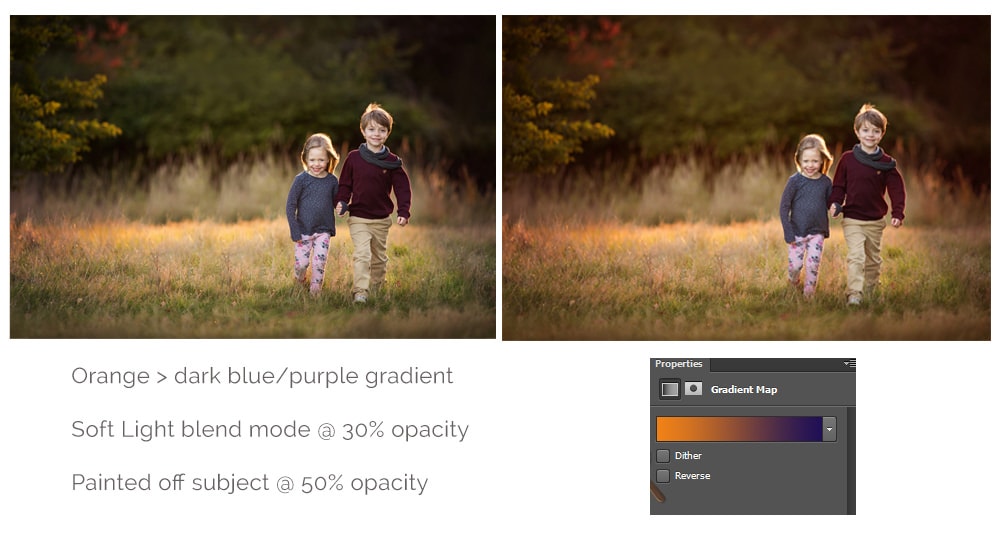
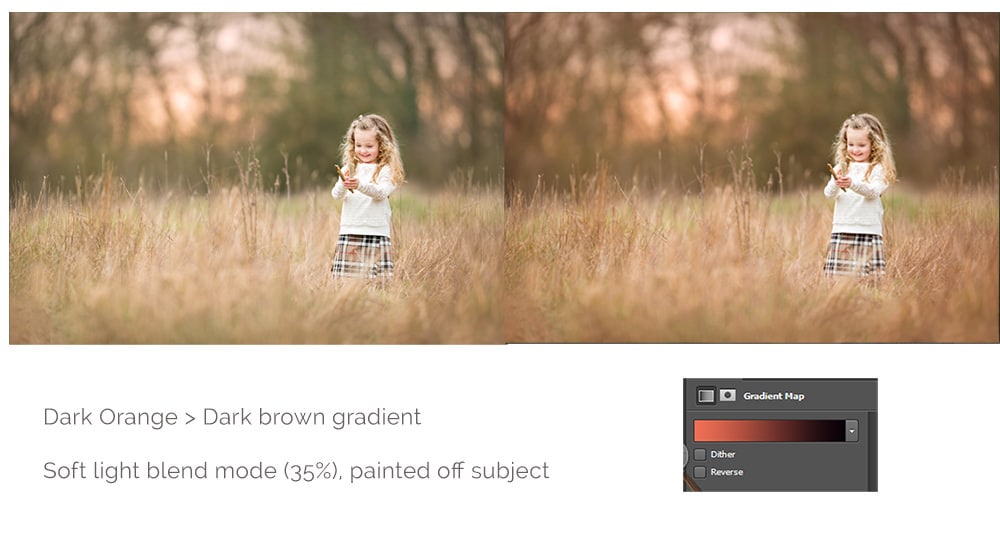
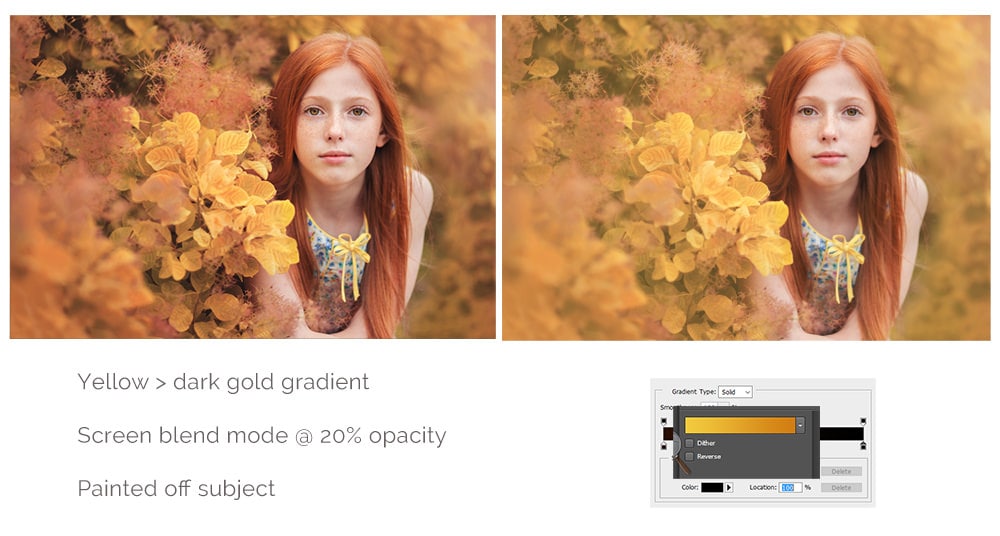

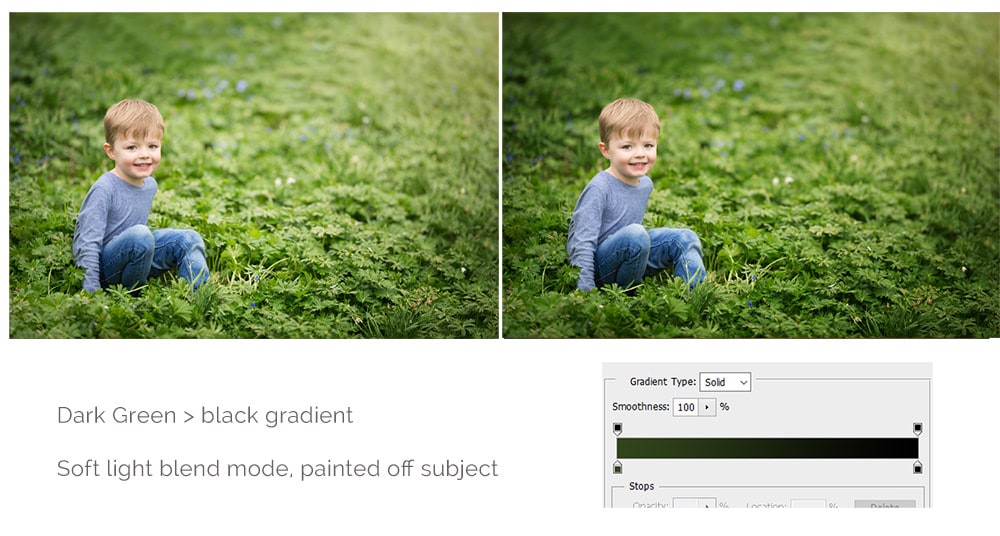
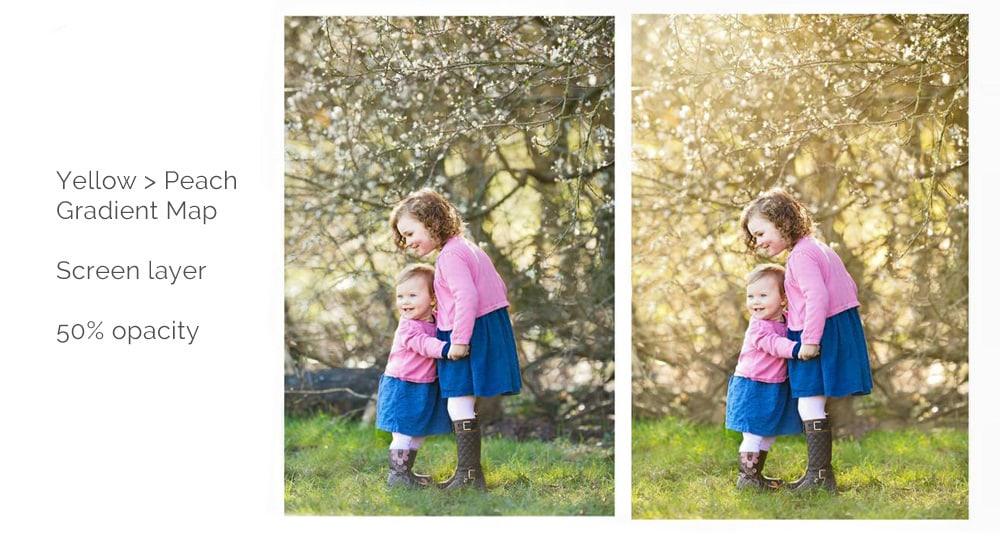
I hope you have found this blog post about using Gradient Maps useful and I would love to see some of your before and after images. Feel free to share them with me on Facebook or send them to me on email to [email protected] and I will add them to this post.
nina mace child photographer
Before and after Gradient Map examples from fellow photographers

Thanks to K Lou Photography for this great before and example image showing how warmth can be added to a background using a Gradient Map.
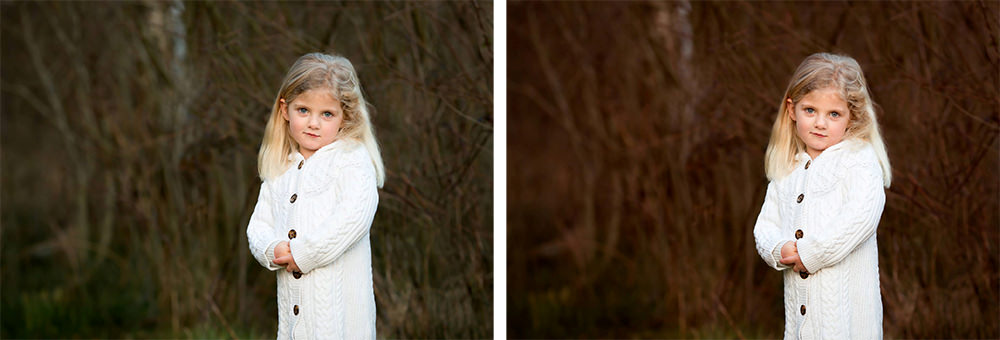

Thanks to Helen Hoffman Photography for these two before and examples. The first uses an orange and brown gradient at 30% opacity and then painting off the subject with a 50% opacity brush. The second image uses a pink/red gradient at 35% and is then painted off subject at 75%.

Thanks to Karen Long Photography for this before and after example using a pink and red gradient map.

Thanks to www.littlehatphotography.com for this before and after bluebells image using a white and yellow Gradient Map

Thanks to Damon Manuel Photography for this before and after bluebells image using a blue Gradient Map
