Photography editing tips: The colour replacement tool in Photoshop
Camera settings: Shot on my Canon 5d iii with the 70-200 2.8 Mark 1. My camera settings were 1/320 shutter speed, 2.8 aperture, 1600 ISO around 7 pm.
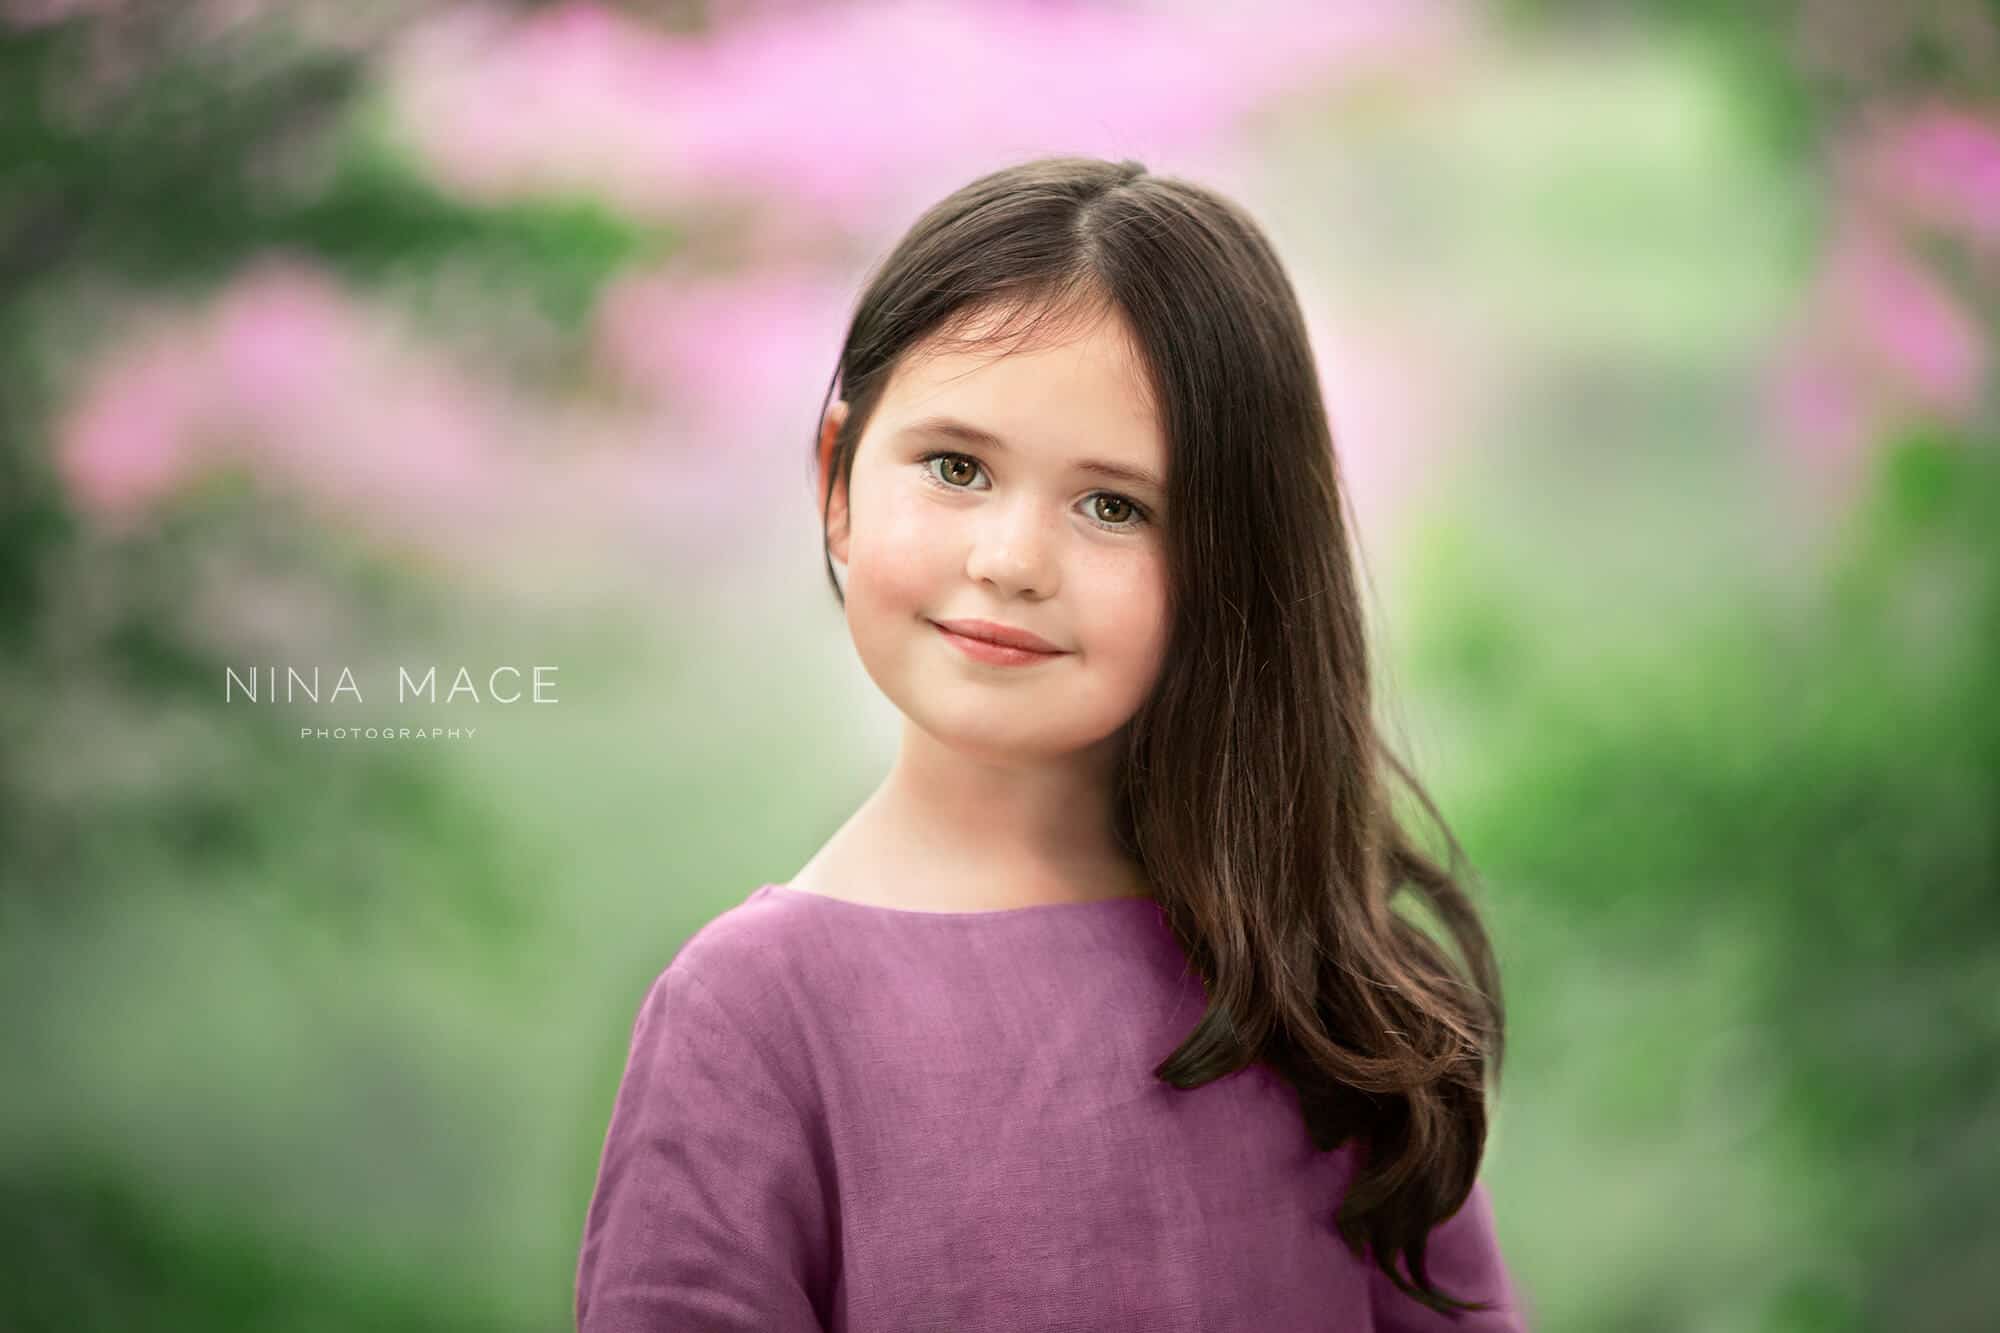
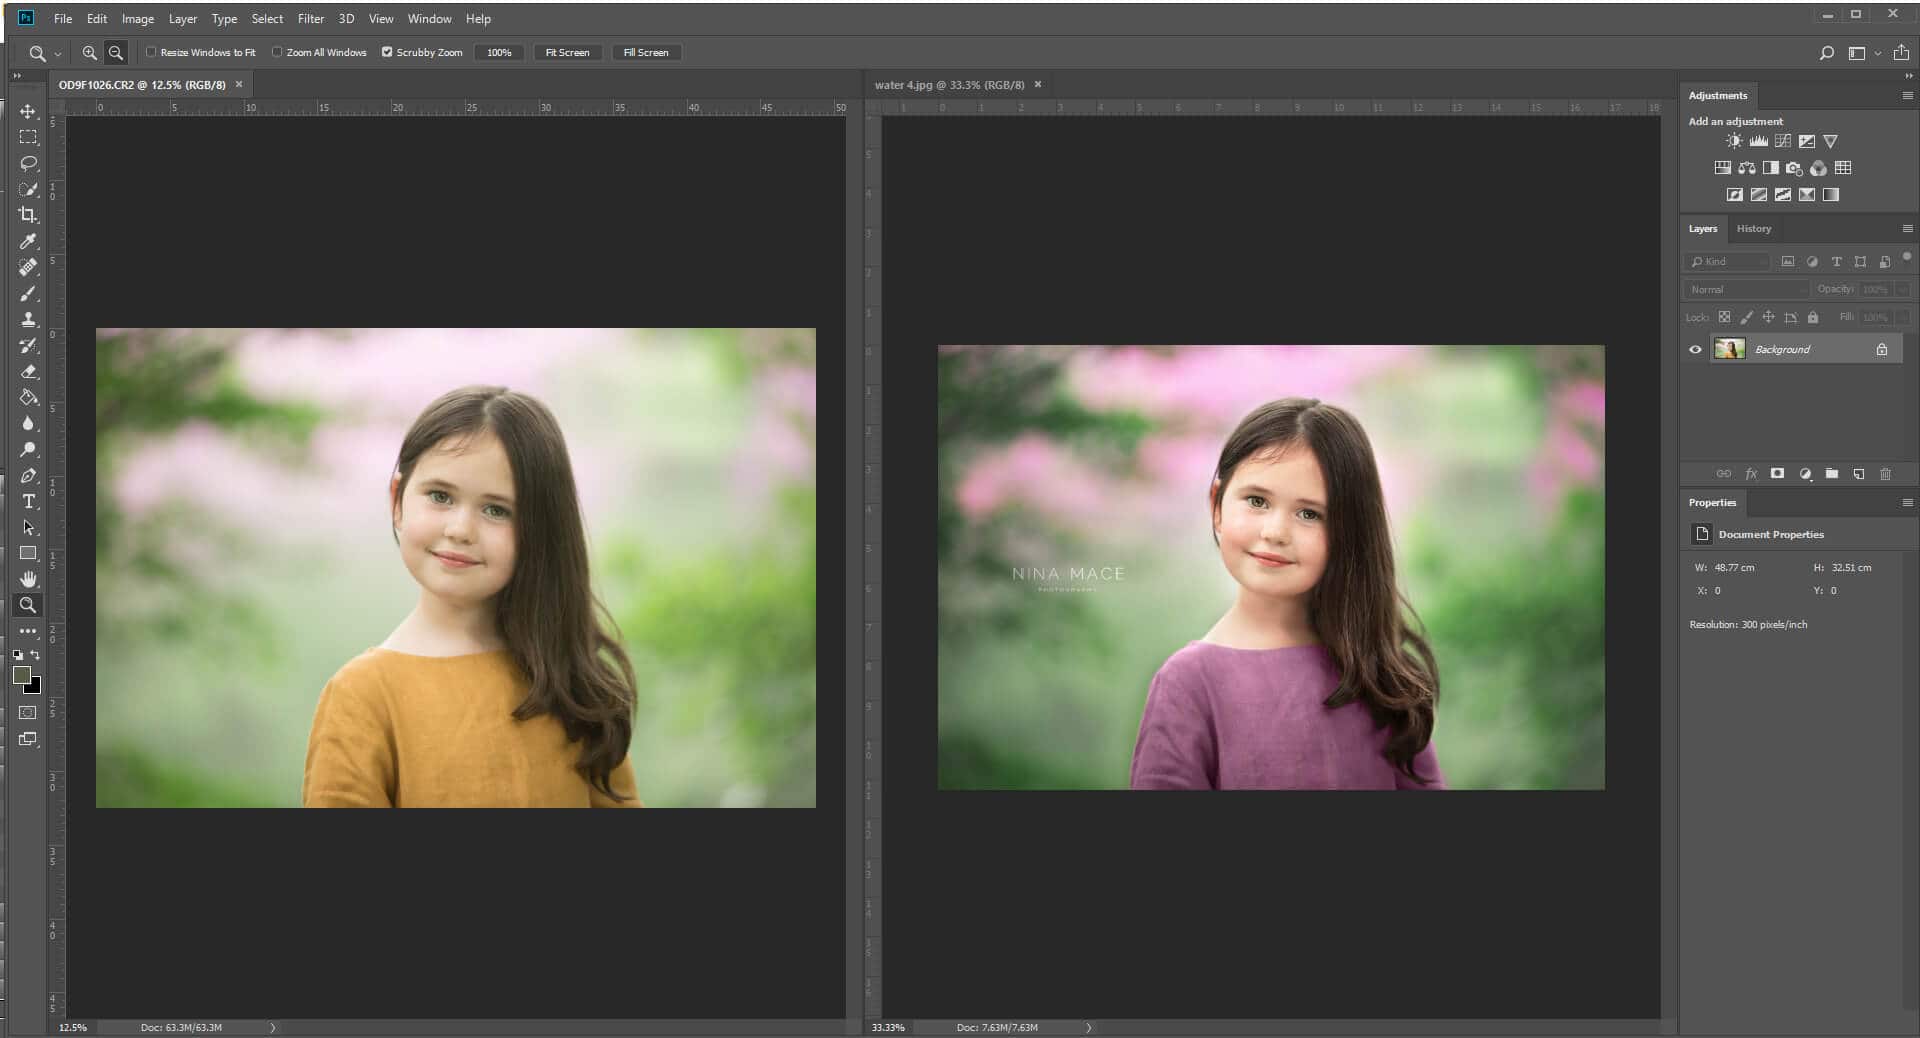
Straight out of camera vs final edit
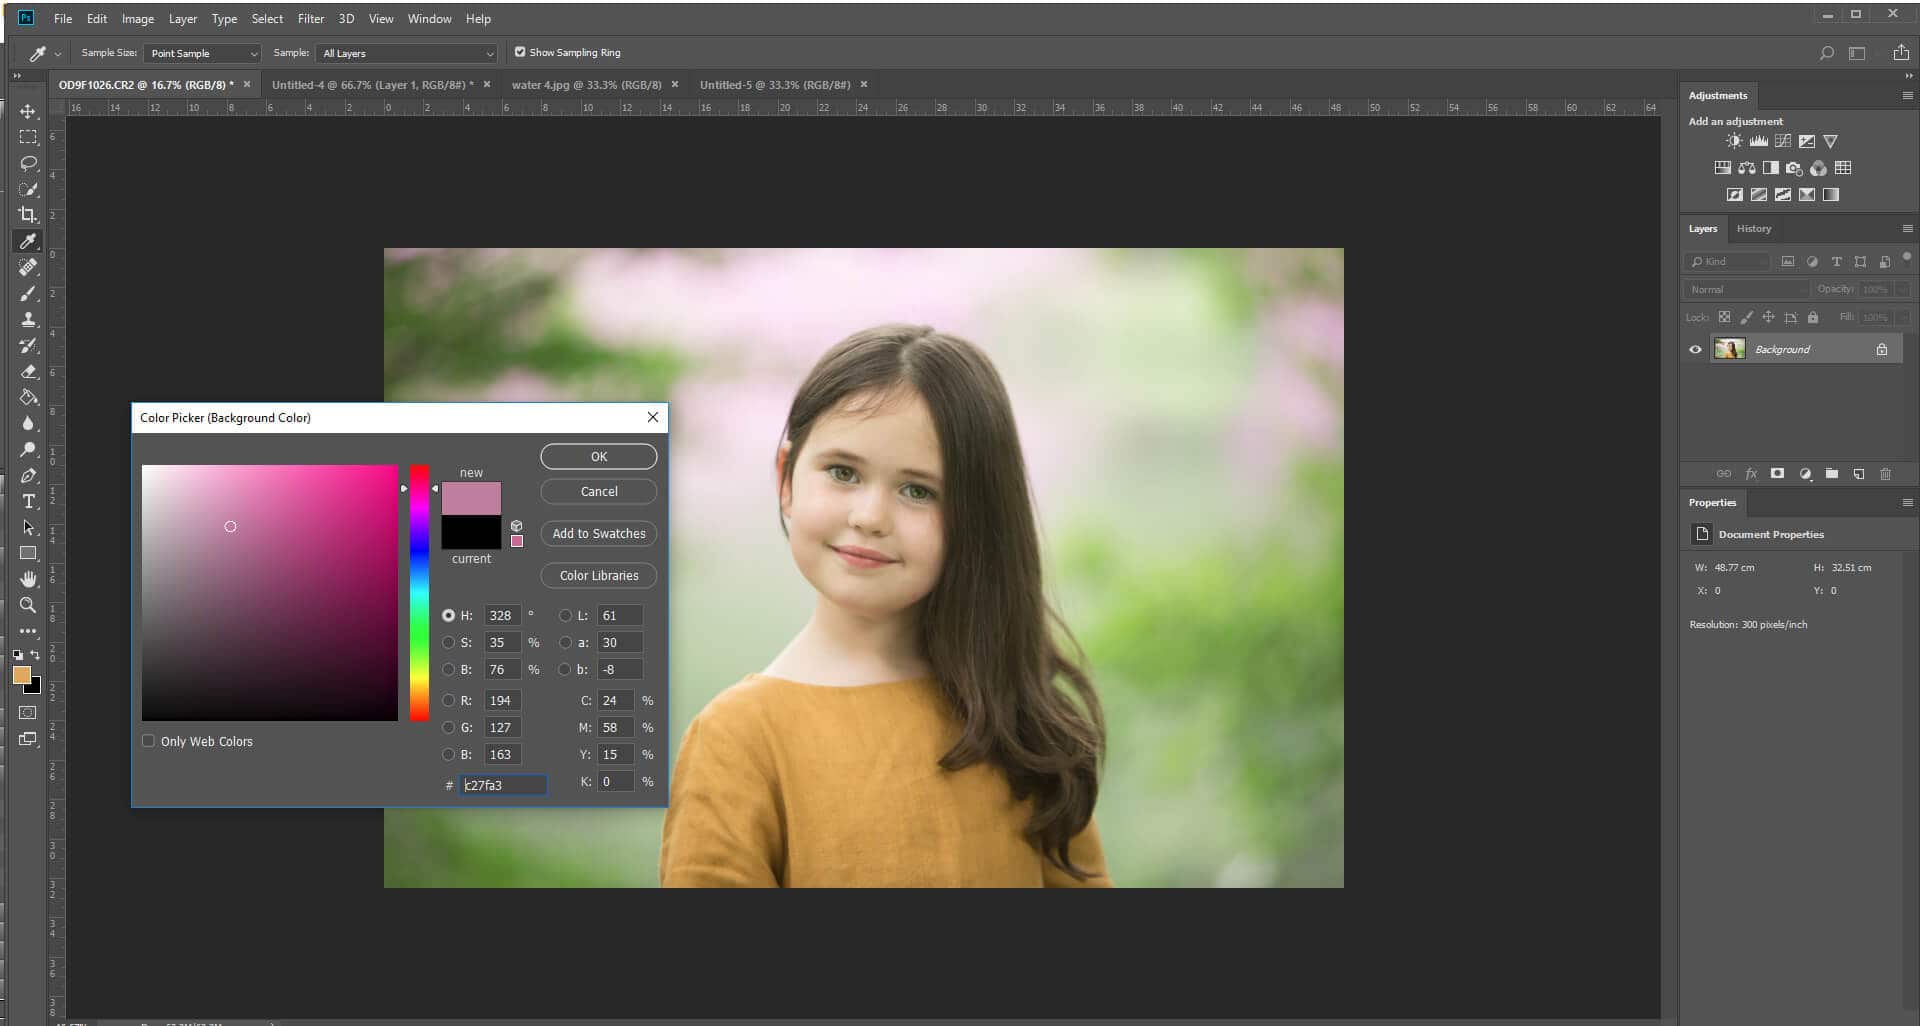
Choosing your replacement colour
The first thing I did was choose the colour that I wanted to change the dress to – in this case, I used the colour picker to select the colour of the flowers in the background and then went one shade darker (I like my subject’s skin to be the brightest part in my image)
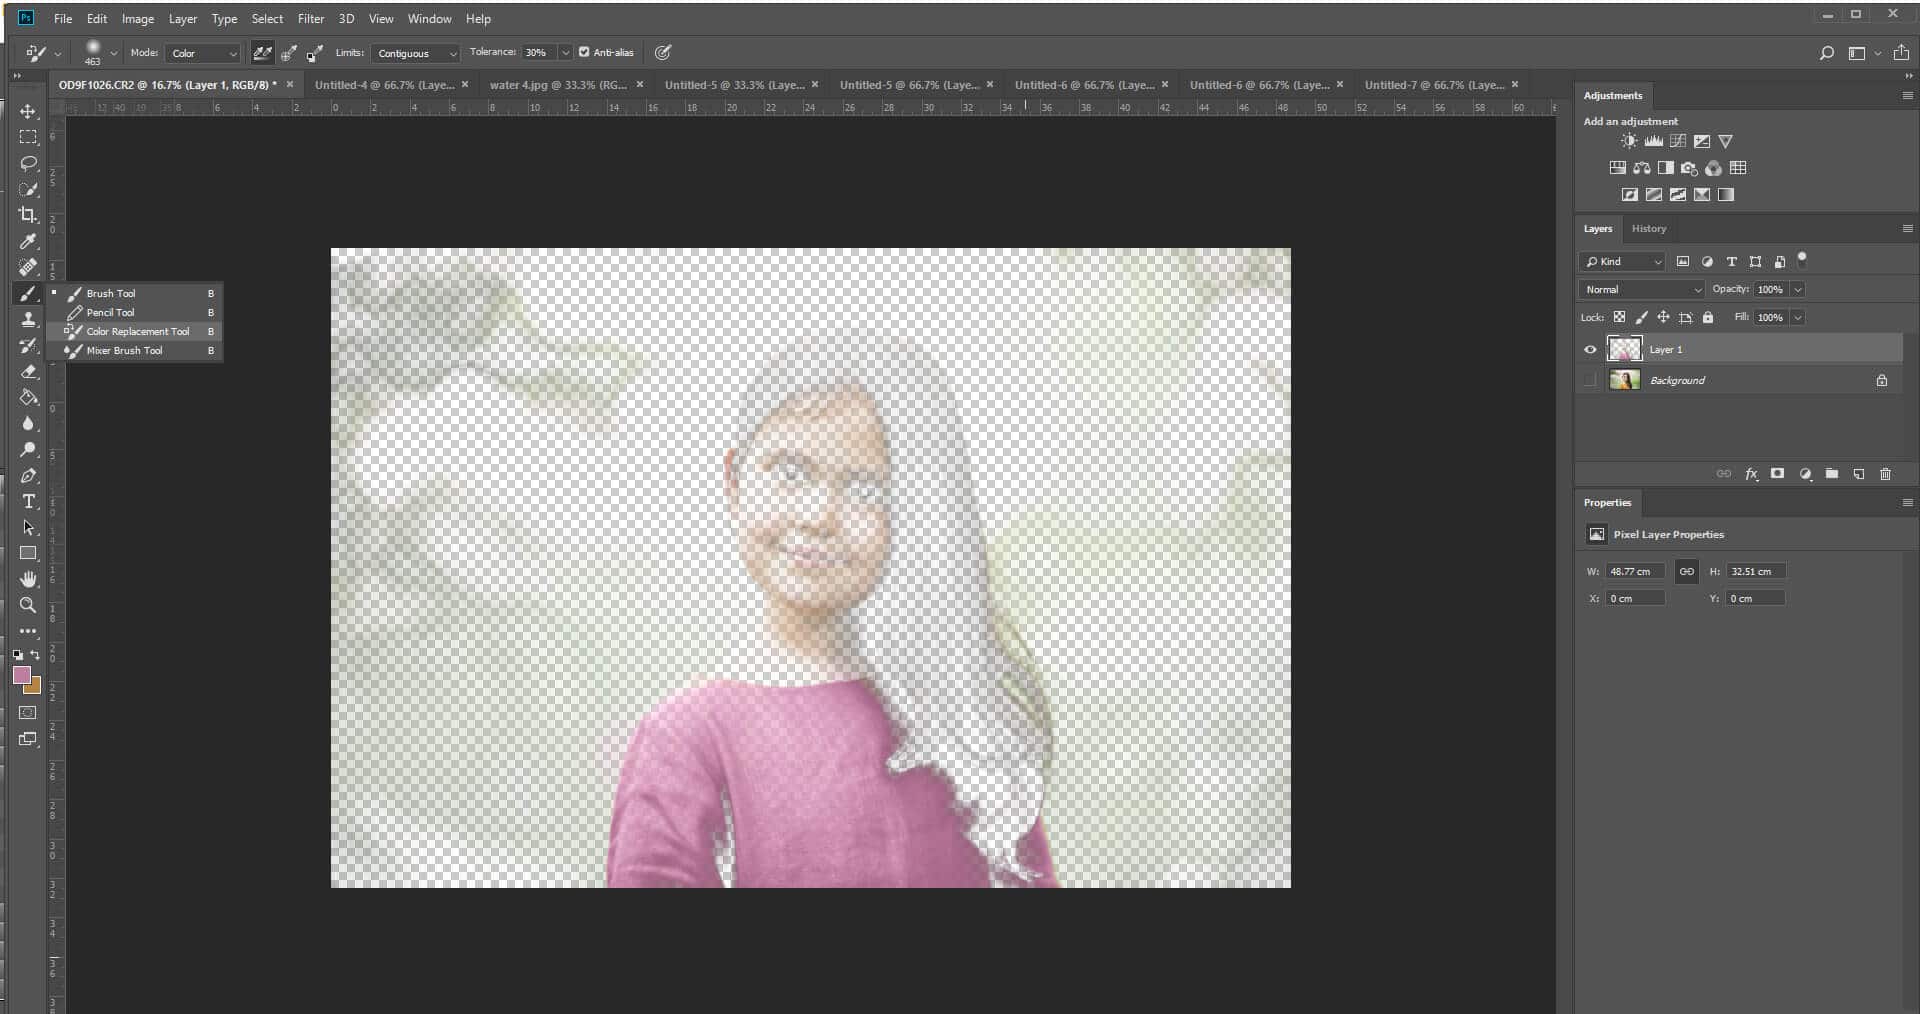
Selecting the area to change
One option is to go straight into using the colour replacement brush, but if you do this you will need to be incredibly careful around the edges of the dress so not to overpaint the skin or the background. To make this as easy and speedy a process as possible, I first select as much as the dress as I can by selecting the yellow colour range. You can find this tool under Select > Colour Range
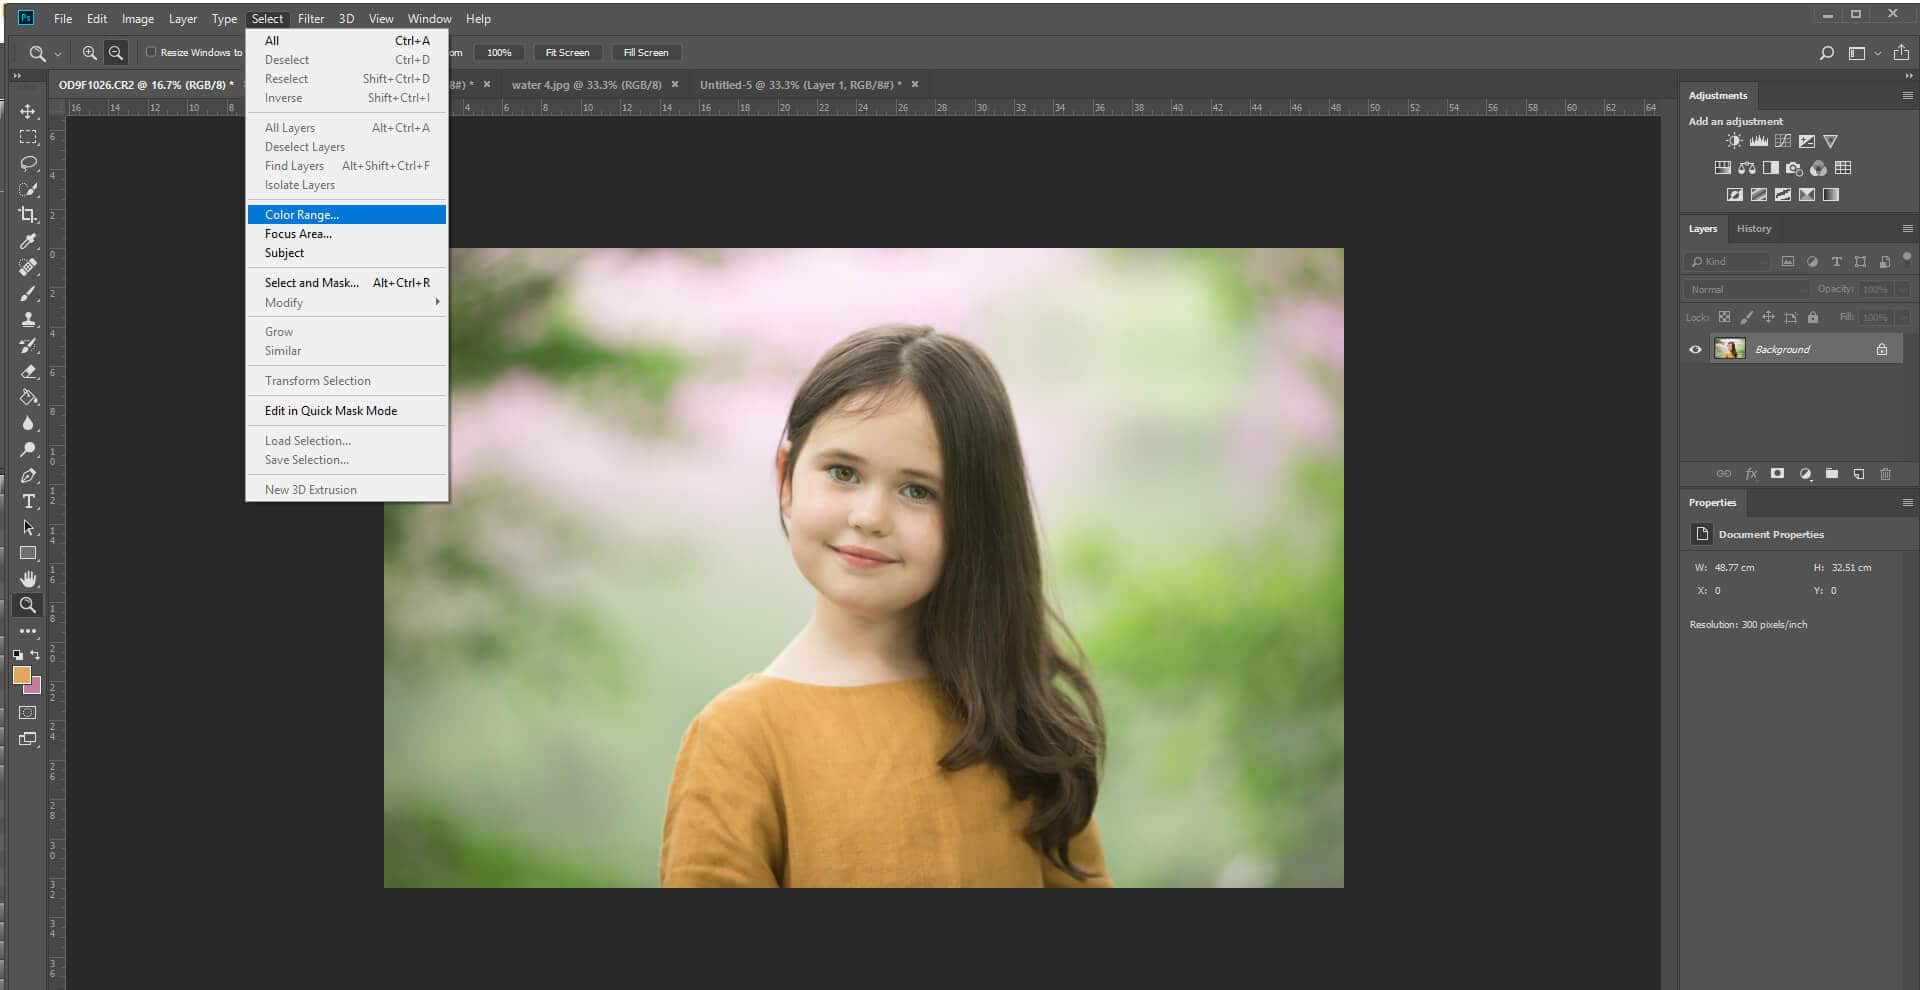
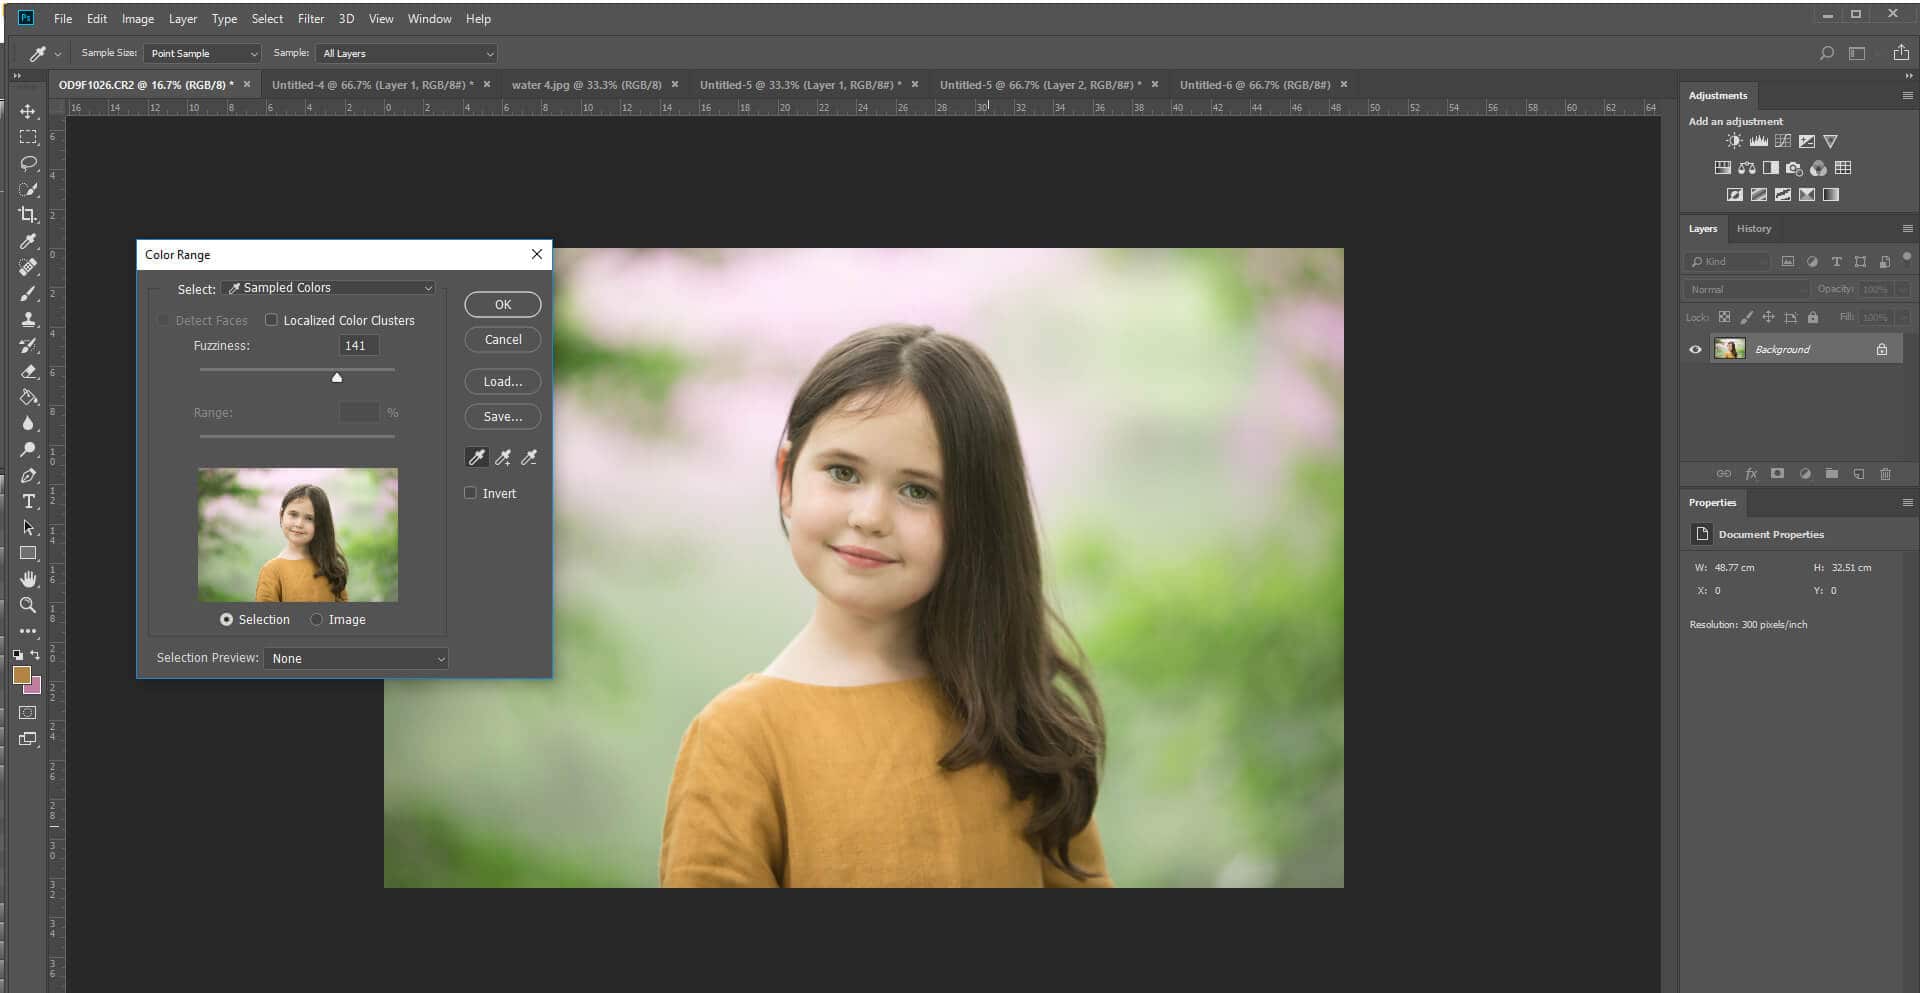
Using the colour select tool
I then use the dropper to select the yellow of her dress. As she has some yellow in her skin this tool is likely to pick up more than just her dress, but it will do a good job of selecting the edge of her dress and not the background. I moved the fuzziness and range sliders until I could see the dress was totally selected.
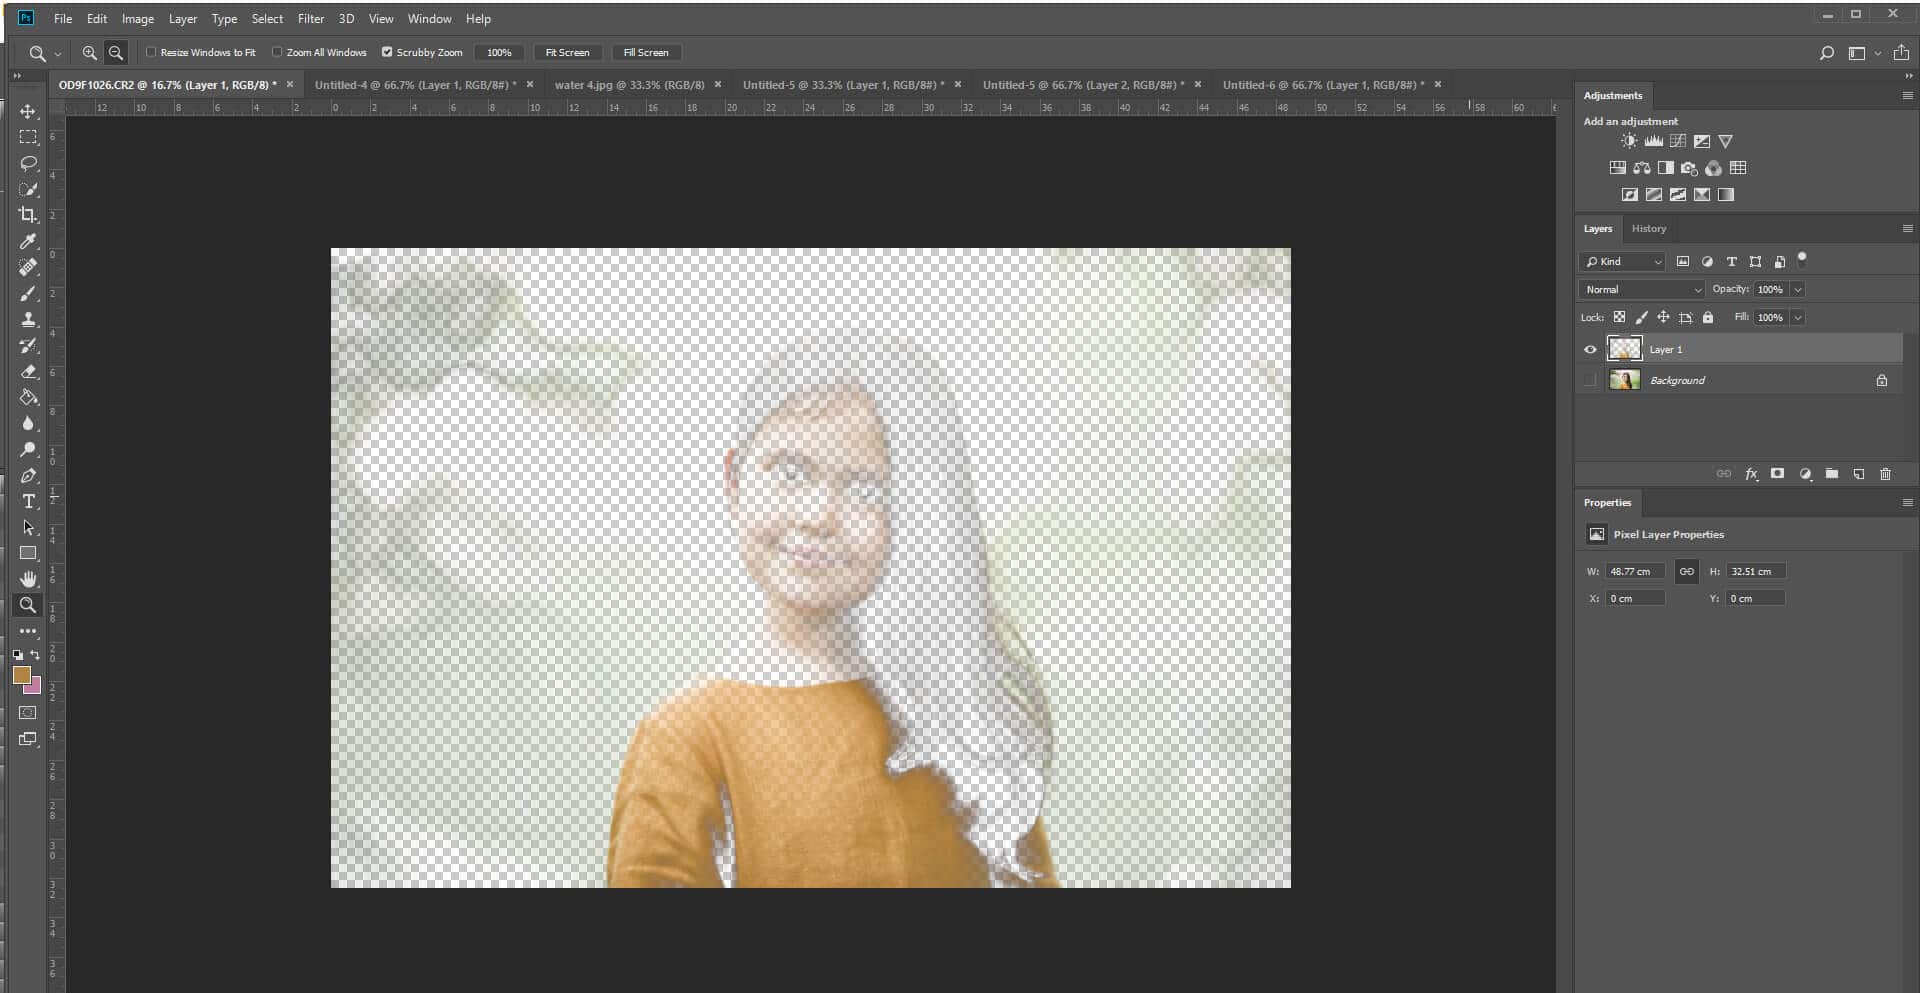
Create a new layer with the selected area
You will then see that the selected area has marching ants around it – I then turn this into a new layer by clicking Ctrl & J (Command J on the Mac). Now I have a new layer which has JUST the colour that I wish to change on it.
Select the colour replacement brush
Finally, right click on the brush icon on the left-hand panel and change to the colour replacement brush. The colour you chose at the beginning should be available to select and now you can paint over on the top layer. Then make sure you go and check around the edges and hairline to ensure all of the original colour has been painted over. Flatten and save and you are done!