Childrens photography courses, behind the scenes
Childrens photography courses 2016
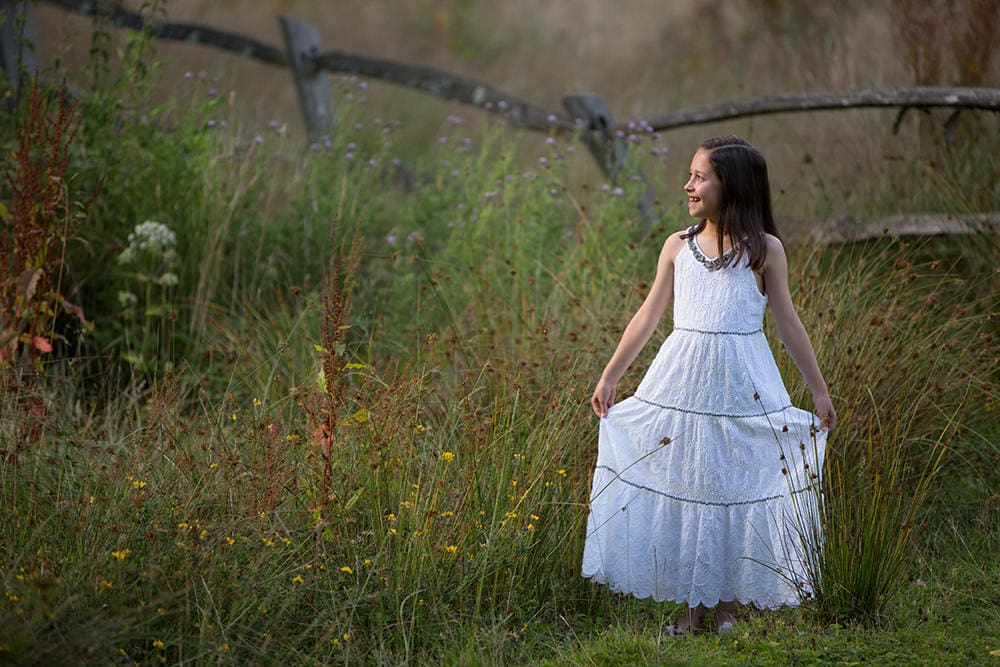
Last year I began running a number of UK childrens photography courses and thought I would share a before and after edit of one of the images I took on one of the dates at Tunbridge Wells. I find seeing other photographers before and after images very inspiring and I myself like to understand why they made the decisions that they did when shooting.
xxxxx
Camera settings
The image below was taken on my Canon 5diii with the Canon 70-200 2.8L (If you are considering upgrading to a 5diii see my friend Phil’s excellent review of the camera here). I was shooting at 200mm at 2.8 as I like to have as much separation between my subject and the background as possible. I aim to keep my shutter speed above 1/500 as this lens is so heavy and I toggle my focus points and use back button focusing. If you would like to see a comparison of my favourite 4 Canon Lenses (200 2.0L, 135 2.0L, 70-200 2.8L & 100 2.8L then visit here)
xxxxx
Step by Step Process
1. Light
xxxxx

2. Composition
xxxxx

3. Adjustments
xxxxx
4. Edit
xxxx
I begin all my edits with a “clean edit” where I check my white balance, make any highlight or shadow adjustments, and remove any small distractions from the shot. You can see that I have removed some white spots from along the fence and a couple of the long pieces of grass which were in front of her dress. I also look to remove any colour casts from my subject which are usually greens in the shadows bouncing up from the ground.
xxxx
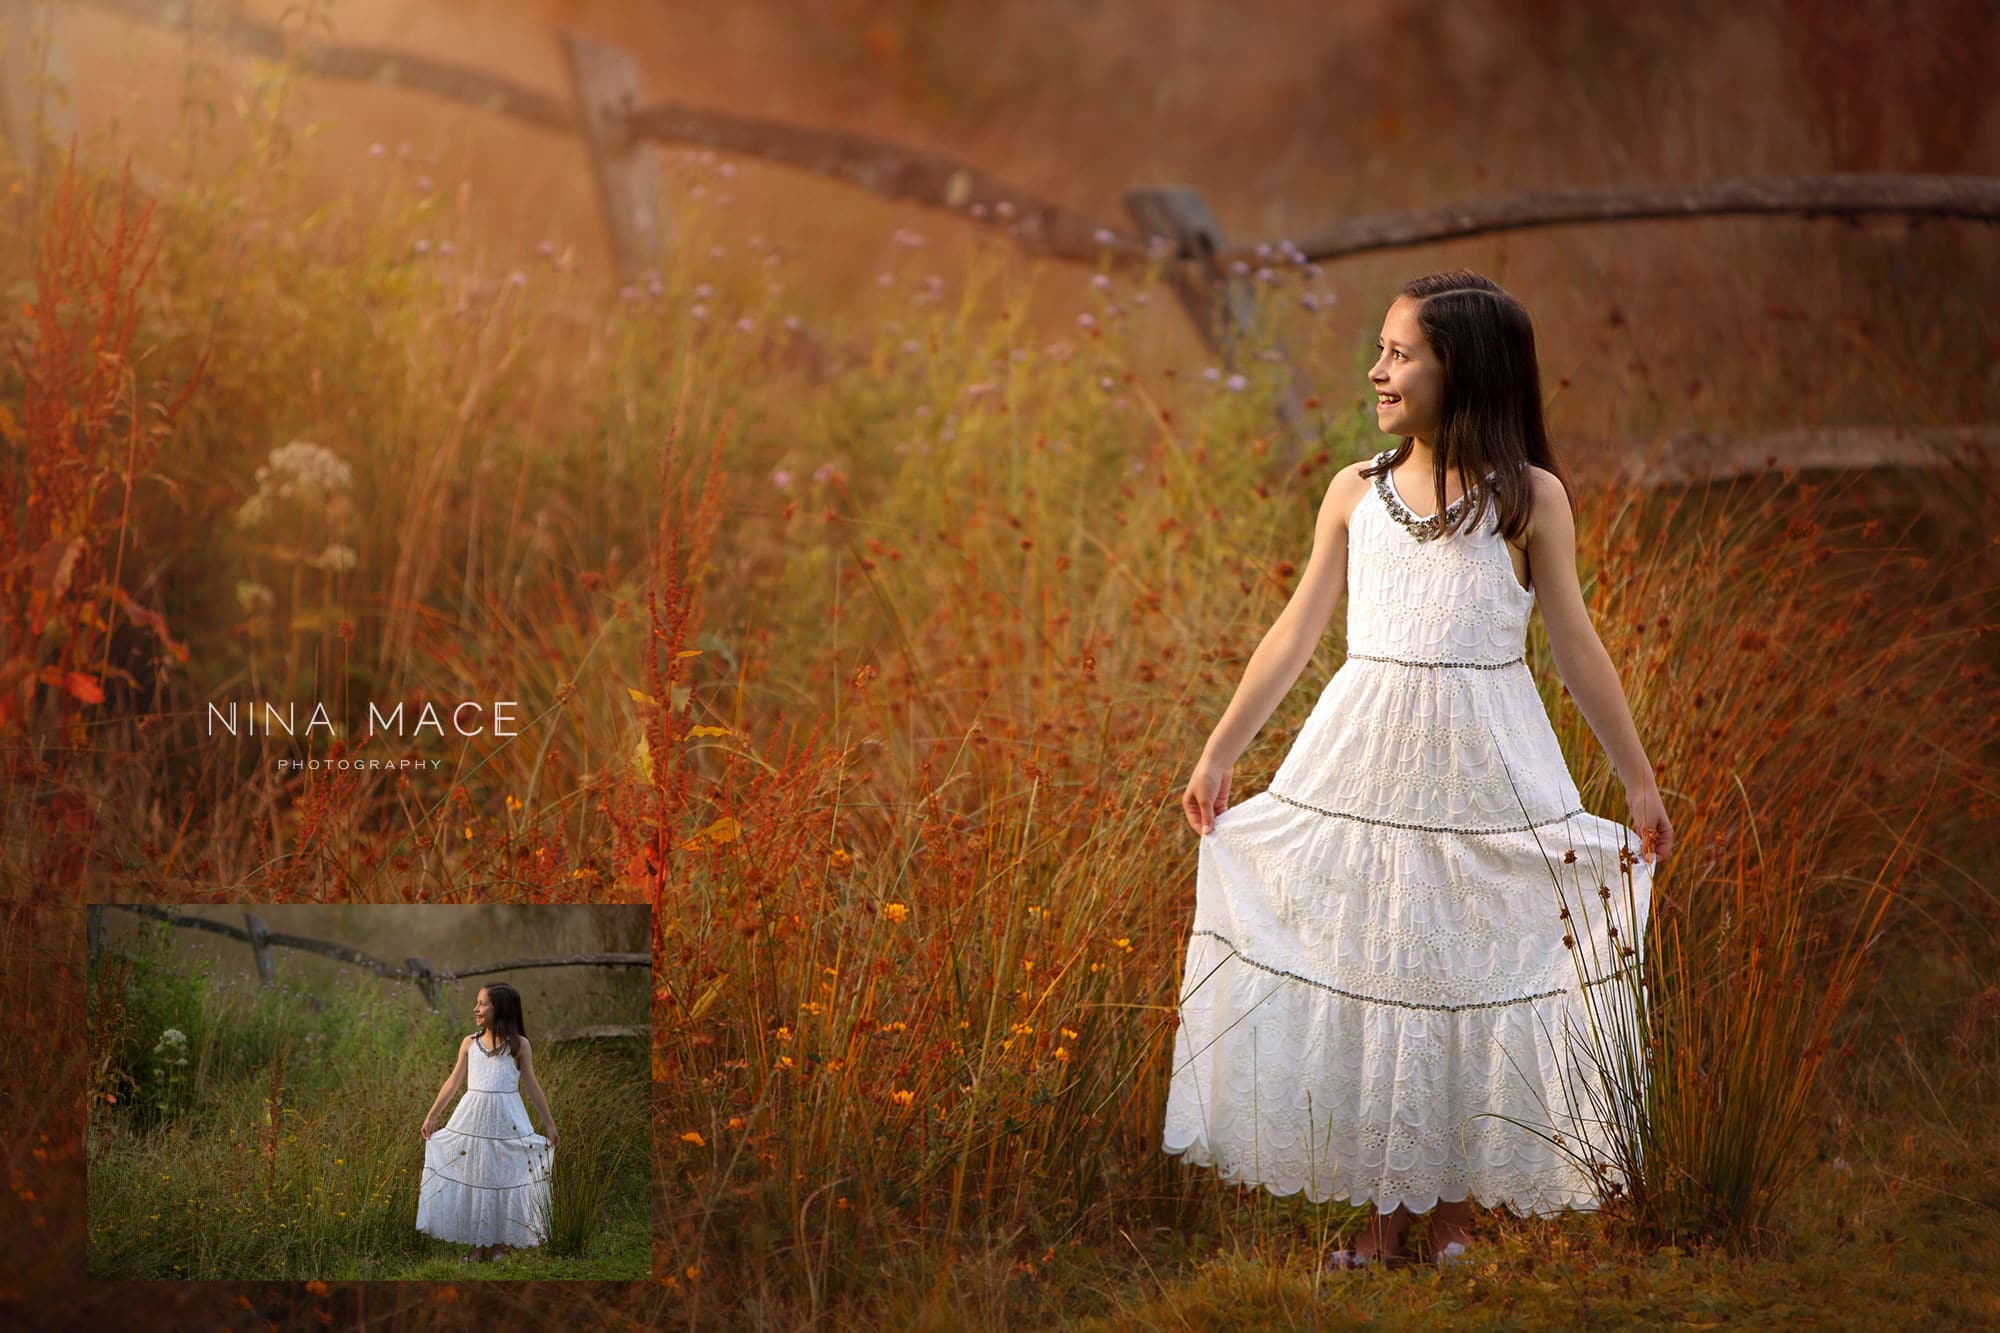
Once my base edit is complete I then look to see how I can create more impact with colour and also building on the light which we had straight out of camera. As it was quite a warm evening, and my model was in a summer dress, my immediate thought when it came to editing was to warm the overall image up. I often use bold and rich greens in my photography but I prefer to do this in the winter, so I planned to add more golden orange and red tones to the image. One of my go to tools for adjusting colour in images is to use the selective colour layer in Photoshop. This tool allows you to change one colour at a time in the image and in this instance I selected the green and yellow and changed the CMYK values to deliver the colour I was looking for.
xxxxx
Below is my final before and after image. I hope you have found this blog post of use.
Workshops & Training
To see a full list of my 2016 outdoor children photography workshops please visit here . I also now offer 1-2-1 Business & Marketing mentoring and in person editing sessions. On these sessions we work together to understand what your editing strategy is and how to develop a visual style which makes your work recognisable. You can also see some behind the scenes images from my children’s photography workshop in Milton Keynes in March.
Thank you for sharing this Nina! I also find bef & after photos really useful, and even better when they come with an explanation of your process as you’ve done in this blog post. Again, thank you!
So pleased you found it useful Sophie 🙂
Looking forward to seeing more of you children workshops this year Nina. Thanks for sharing the behind the scenes photos
Thanks Sam
I had no idea about using a selective colour layer in PS. I love how you warmed up the overall tone of the shot, but her dress still looks white. Now, I need to start figuring out how to use selective colour layers in PS.
Thank you for sharing your valuable knowledge Nina. Your step by step process is a real eye opener! I am definitely going to try selective colour layer in my own editing. Many thanks.
Great blogpost Nina, very informative! Love the edit 🙂